How to Apply Shrink Sleeves to Bottles?
Applying shrink sleeves well is less about forcing film onto a bottle and more about controlling fit, alignment, and heat. The process looks simple. Small errors show quickly. A sleeve that sits crooked before heating may wrinkle around the shoulder, while excess heat can distort the label or container. Packaging engineer Maya Chen is a fictional illustrative expert, not a real source; her practical reminder is: “Measure the bottle, test the sleeve, and let the heat do only what it needs to do.”
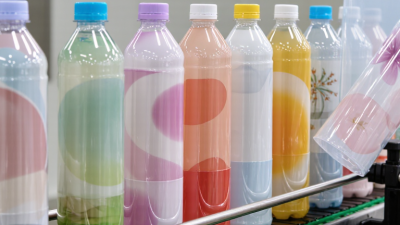
Begin with a clean, dry bottle and a sleeve sized for its widest points and contours. Check the sleeve’s orientation, seams, and perforations before placing it over the container. Keep the artwork aligned with the bottle’s front panel. Then move the sleeved bottle through a compatible steam or hot-air tunnel, following the film and equipment suppliers’ settings. Watch the first few bottles closely. Look for smooth coverage, clear graphics, and an even finish around the neck and base. Tiny creases matter.
There is no universal temperature or conveyor speed. Bottle material, sleeve film, and tunnel design all change the result. Adjust one setting at a time, and record what works. A modest test run can prevent a whole batch from needing rework. Even experienced operators sometimes miss a subtle shift in sleeve position. That is worth admitting. Verify the setup again after a film roll change, equipment adjustment, or bottle-size change, and consult supplier guidance when results remain inconsistent.

Prepare the Bottle and Choose the Correct Shrink Sleeve
Before applying a shrink sleeve, inspect the bottle for dust, moisture, oil, or residue. Wipe it with a clean, lint-free cloth and let it dry fully. A wet surface can trap droplets beneath the film. Check that the bottle is intact and stable; sharp edges or dents may cause uneven shrinking. Note any raised seams or deep grooves, since these can affect how the sleeve sits.
Measure the bottle at its widest point and around the area the sleeve will cover. Choose a sleeve size and material that match those measurements and the bottle’s shape. The sleeve should slide on without excessive force, yet leave enough room to shrink snugly. Check its stated shrink range and heat requirements. Bottle materials vary, so test one sleeve on a sample before preparing a full batch. I have found that one small measurement error can show up clearly at the base.
Tips: Keep bottles clean and at room temperature. Align the sleeve’s seam or printed panel before heating. Use the sleeve supplier’s process guidance, and apply heat evenly. Stop if the bottle softens or the film wrinkles badly. A test piece may look fine, but production conditions can still differ.
How to Apply Shrink Sleeves to Bottles
Prepare the bottle and choose a sleeve width that matches its measured diameter.
For a round bottle, the approximate layflat width of a tubular sleeve is half the bottle circumference (π × diameter ÷ 2). These values are geometric estimates in millimeters, before allowances for the bottle shape, sleeve material, and fit. Measure the bottle at its widest point and confirm the final sleeve choice with a fit test.
Measure the Bottle and Cut the Sleeve to Size
Measure the bottle before cutting anything. Record its usable height, including the area you want the sleeve to cover, and measure circumference at the widest point. Check the shoulder, base, and any ridges too; a bottle is rarely a perfect cylinder. For a full-body sleeve, the widest section must pass through the sleeve opening. Ask the film supplier to calculate the layflat width using the film’s shrink ratio. Don’t simply divide the bottle circumference by two and assume it will fit. Shrink performance varies by film and direction.
The Flexible Packaging Association’s 2024 State of the U.S. Flexible Packaging Industry report estimated U.S. sales at $42.9 billion in 2023. That scale makes accurate converting measurements important, but the bottle still sets the dimensions. Cut a short test sleeve first. Check that it slides over the cap or base, then confirm the coverage height after shrinking. Leave enough height for trimming and registration, but avoid excessive material that can wrinkle at the shoulder. A small mistake shows quickly. I would remeasure a tapered bottle twice; it is easy to use the widest body measurement where the sleeve actually needs to pass over the cap. Test with the intended heat source, since uneven shrinking can make a correct cut look wrong.
Position the Sleeve Around the Bottle
Start with a clean, completely dry bottle and a sleeve that fits its shape. Hold the bottle steady on a flat surface. Small shifts matter. Check the printed front panel and any seam or perforation before sliding the sleeve into place. Turn the artwork toward the bottle’s main viewing side, then guide the sleeve down without pulling or twisting it. Keep it loose. A stretched sleeve can sit unevenly once heat is applied.
Use the bottle’s shoulder, base, or a molded ridge as a visual reference. Leave a consistent gap from the bottom edge, and make sure the top of the sleeve does not cover a cap or closure that should remain visible. Rotate the bottle slowly and check the position from several angles; a label can look centered from the front but drift toward one side. If it is off, reposition it before shrinking. Don’t force a stubborn sleeve over a sharp edge. I’ve found that a quick dry fit catches many alignment problems, though bottles with unusual shoulders may need a little trial and adjustment. After positioning, confirm the sleeve lies flat, with no folds or trapped debris.
Apply Heat Evenly to Shrink the Sleeve
A shrink sleeve should settle smoothly around the bottle, not tighten in one spot while staying loose elsewhere.
Check that the sleeve is positioned correctly and the bottle is dry before applying heat. Follow the sleeve supplier’s temperature and equipment guidance, since different films respond differently. Keep the bottle moving, or move the heat source around it, to warm every side evenly. A heat gun held still can create hot spots, causing wrinkles or a distorted label. Small adjustments matter. Start with gentle, consistent heat near the sleeve’s center, then work toward the top and bottom edges. Keep the nozzle at a steady distance and avoid directing heat at one area for too long.
Watch the film as it contracts. It should draw close to the bottle without scorching, splitting, or pulling the printed design out of alignment. If the bottle has shoulders or grooves, briefly direct heat toward those contours while continuing to rotate it. A common mistake is rushing the final pass; the seam may look flat from one angle but remain loose on the far side. Pause and inspect the whole bottle under good lighting. If you spot a crease, adjust the heat gradually rather than blasting it. Even careful work can leave a small wrinkle, so test a few sleeves before running a larger batch. A consistent hand takes practice.
Inspect the Fit and Allow the Sleeve to Cool
After the sleeve exits the heat tunnel, inspect it while the bottle is still warm. Look closely. Check the shoulder, base, seam, and any recessed panels for wrinkles, bridging, or exposed bottle surface. The top and bottom edges should sit evenly, not curl or drift. Rotate the bottle under bright light; a defect can hide on the far side. A quick glance can fool you. If the sleeve looks loose, do not raise the tunnel temperature blindly. Check film orientation, bottle shape, line speed, and the sleeve’s printed shrink profile first.
Cooling sets the final fit. Keep bottles upright and separated until the sleeve feels stable and no longer shifts under light handling. Avoid cold air aimed at one side; uneven cooling can leave a smooth face and a puckered seam. Record tunnel settings, conveyor speed, and sleeve shrink measurements for each trial. ASTM D2732, the standard test method for unrestrained linear thermal shrinkage of plastic film, provides a way to measure shrink in both film directions. Compare those results with the film supplier’s technical data, rather than relying on one universal temperature. If the sleeve still moves after cooling, pause and inspect the process. It may be a sizing issue, not a heating issue.